


There are three basic tasks that you should always be looking to execute. They are:
1. Can I make a new point?
2. Can I hit one or more of my opponent’s checkers?
3. Can I escape one or more of my back checkers?
Let’s analyze each of these tasks
Make a New Point
The first task of checker play is, “Can I make a new point?” For those of
you who are absolutely new to the game, a point is formed by putting two
of your checkers on the same triangle. Interestingly, the space occupied by
that triangle is also called a point, but that’s beside the point. There are many reasons to make points and I’ll go over a few of them now.
1. If you make a point in your home board it can block your opponent’s forward progress. Additionally, a home-board point can prohibit the entry of an enemy checker from the bar.
Position 1 – Black has played 42: 8/4, 6/4
2. Points outside your home board can block your opponent’s forward progress, but can’t keep them from entering from the bar
Position 2 – Black has played 61: 13/7, 8/7
3. If you assemble enough points in a row you can severely restrict your opponent’s forward progress; and if you build a wall or “prime” of six points in a row, they can’t escape at all until later in the game when you elect or are forced, to disassemble that prime.
Position 3 – Black has a “prime”
4. Points can also be used as landing spots for you to safely move your checkers from one quadrant of the board to another.
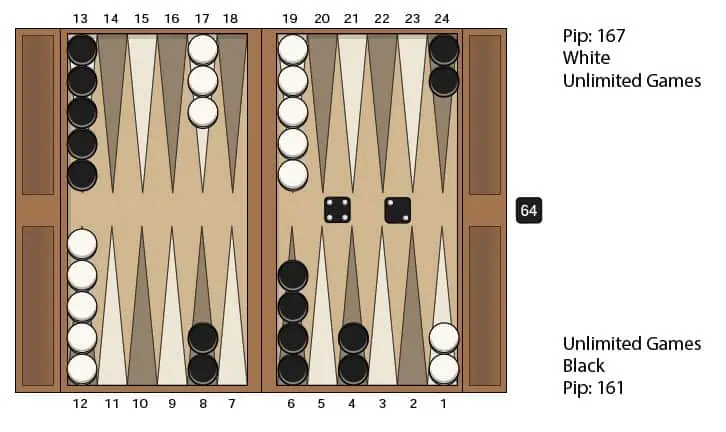
Position 4 – Black on roll to play 64

5. Finally, points made in your opponent’s home board are “anchors”: defensive bastions that impede your opponent as they try to come home. These anchors can also serve as landing spots for bringing checkers back into battle.
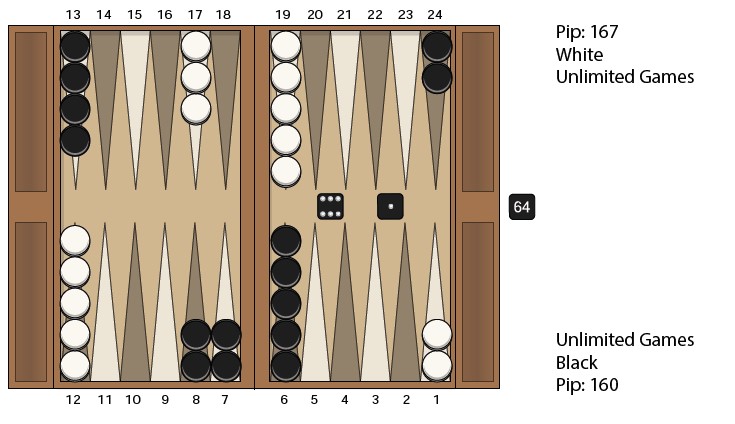
Position 5 – Black on roll to play 54
Hit Your Opponent’s Checkers
The second basic task of checker play is, “Can I hit one of my opponent’s checkers?”
Here are some reasons why hitting your opponent’s checker(s) can be beneficial.
Since backgammon is, like Parcheesi or Sorry!, fundamentally a racing game, you gain ground in the race by sending your opponent’s checkers back to the bar. That, for a checker, is like a player being sent to the penalty box in hockey: he cannot come back to play in the game until the penalty is over.
Position 6 – Black on roll to play 31
The substance of that penalty is that your opponent cannot play until he rolls a number that corresponds with a point in your home board not occupied by two or more of your checkers.
The ultimate penalty occurs when you have a closed board and you hit one of your opponent’s checkers. In that case, he can’t enter until you elect to, or are forced to, break your home board.
Position 7 – Black on roll to play 62
Usually you will not have a closed board, but the more points you have in your board, the more difficult it will be for your opponent to bring checkers in from the bar and back into the battle.
A second reason for hitting your opponent’s checkers is that they cannot then be used to make points, primes, and closed boards to block you!
Position 8 – Black on roll to play 62

A third reason for hitting is to take half of the opponent’s roll away. Once you hit their checkers, they will be unable to make new points in their home board unless they happen to come in from the bar with a double.
Escape Your Back Checkers
The third task of basic checker play is to escape your back checkers.
The reason this is important is that you can’t win the game until you bear off all of your pieces, and you cannot do that until you get all of your checkers home. You should usually try to complete this task early in the game before your opponent can “prime you in.”
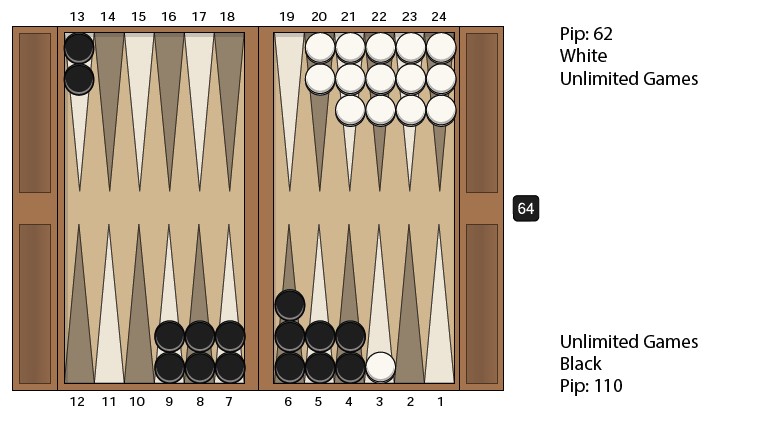
Position 9 – Black on roll to play 63
If one or more of your checkers is trapped behind a prime and you don’t have a prime of your own to trap your opponent’s checkers, then you are likely to lose the game.
Weighing Your Choices
These three basic checker-play goals are each important, but none of them is more important than any other outside of a specific context.
One useful rule of thumb is that if you have a play that does more than one of these tasks at the same time as opposed to a play that does only one, there is a reasonable chance that the double-barreled play will be preferable.
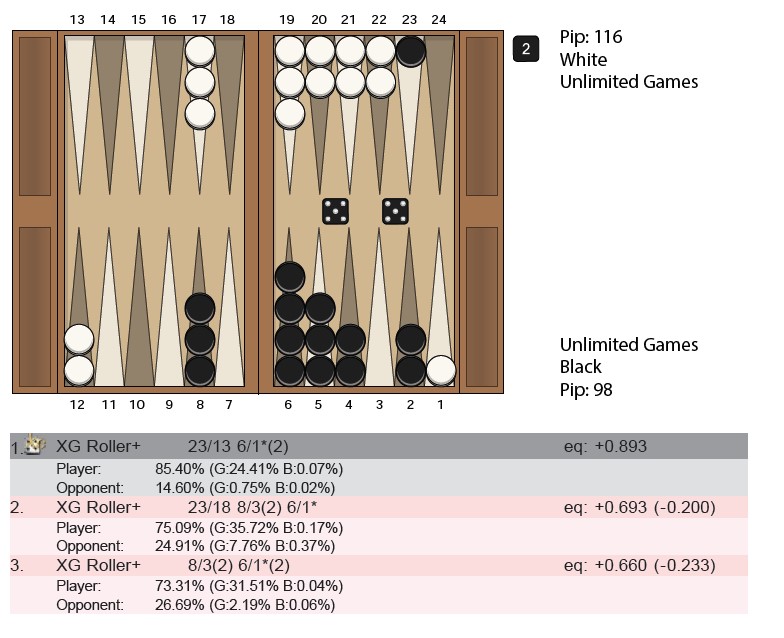
In Position 10 Black has a 1 and a 3 to play. Black can hit White’s checker on the 20 point or can make their own five point. Both moves have benefits for Black, but making the five point accomplishes two tasks (hitting and making a new point) whereas hitting on the 20 point only accomplishes one.
Position 10 – Black on roll to play 31
In Position 11, let’s take a look at two of Black’s choices. They can either hit and escape (accomplishing two tasks), or they can make their own five point (accomplishing only one task). In this case, it’s right to hit and escape rather than to make a good point in your home board because you not only send your opponent back in the race, but you hamper Black’s efforts to block you in their home board.
Position 11 – Black on roll to play 65
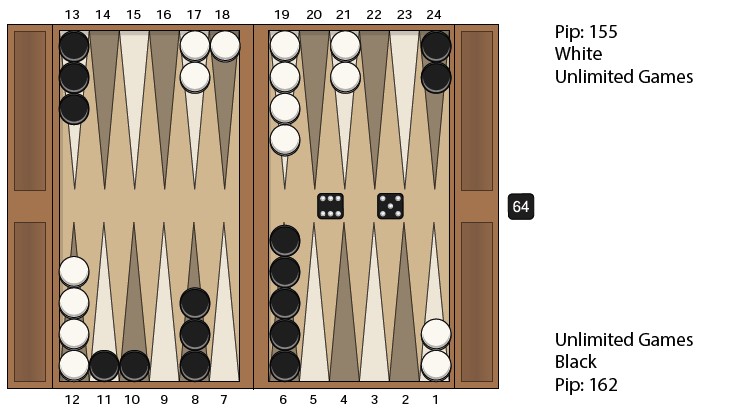
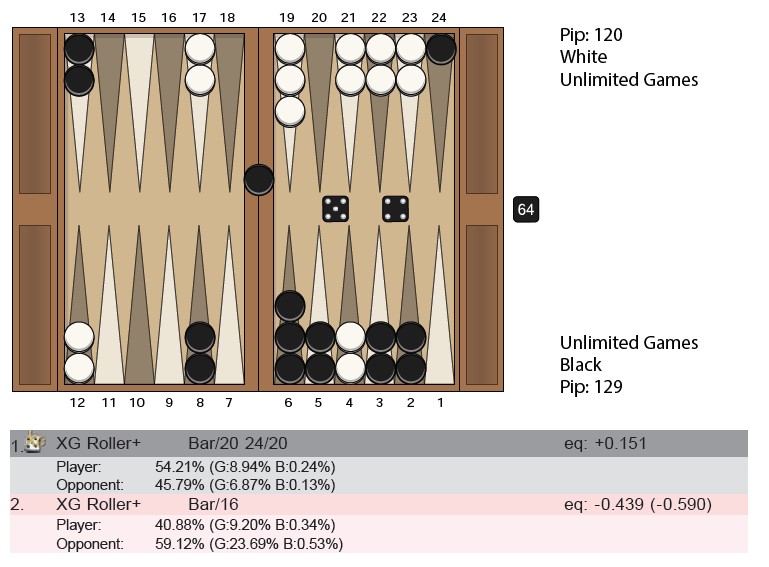
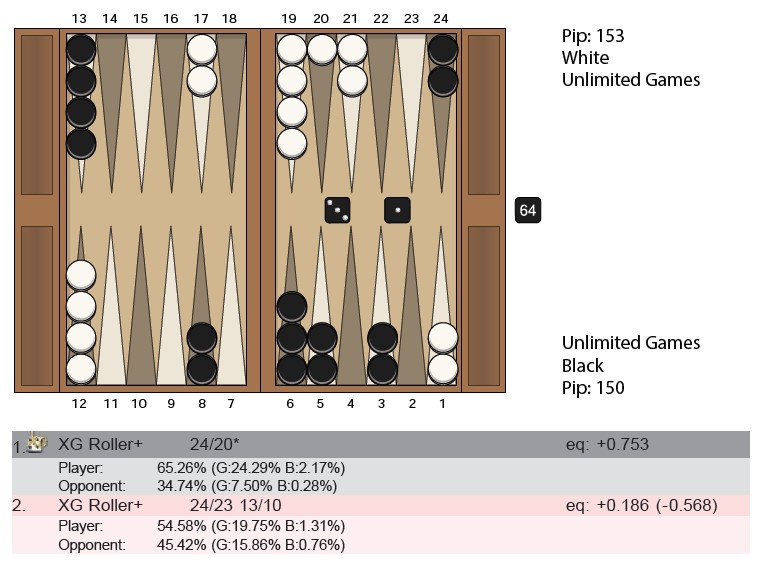
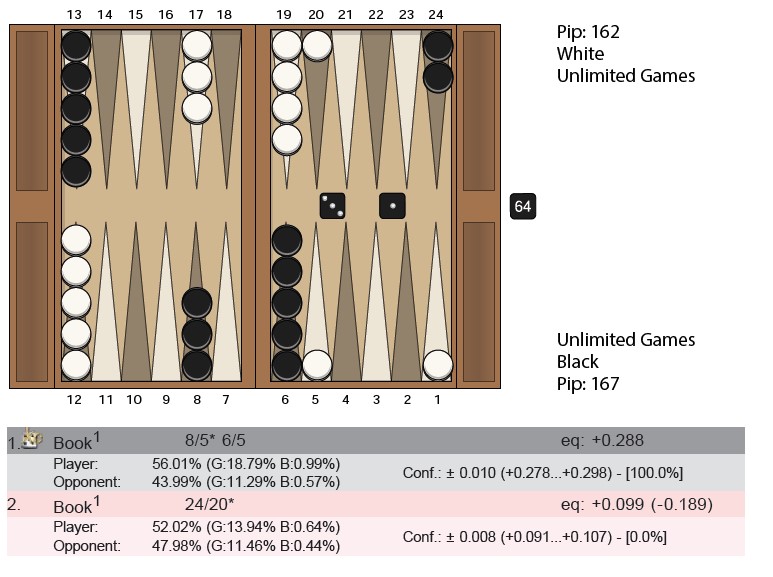
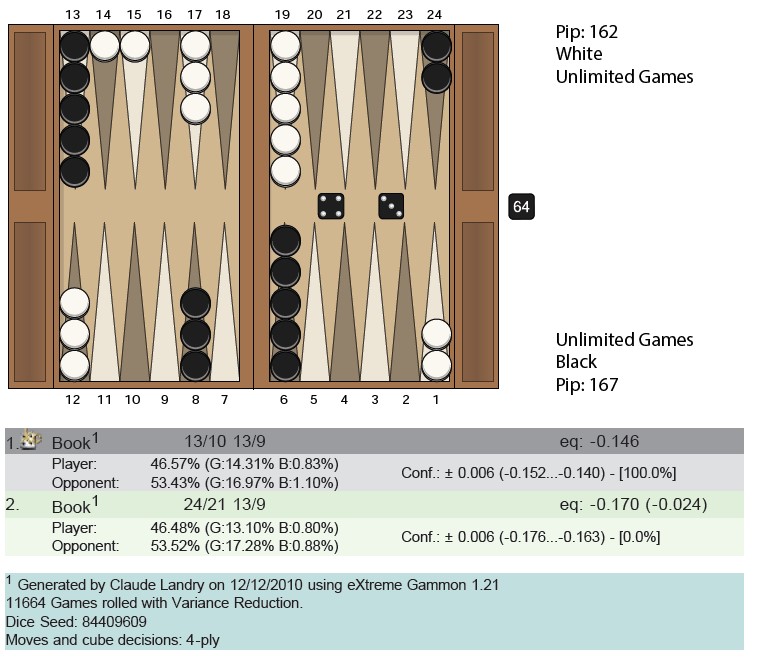
A third example of accomplishing two tasks versus one arises when you can escape and make a new point, as opposed to simply making a new point. An example is Position 12 below, which hits as well.
Position 12 – Black on roll to play 64
Some of the best possible rolls are ones in which all three tasks are accomplished in one move. Usually, this occurs when you roll a double, as then you can move four different checkers in one play. In Position 13, Black rolls a 5-5: a fantastic roll, but how do we play it?
One choice is to close your board by making your three and one points, but then you still have to escape your back checker in order to win the game.
A better option is to run from the 23 point to the 13 point and make your own ace point. This play accomplishes all three tasks at the same time. And while it isn’t always correct to achieve those three tasks, a play that does so should certainly be on the top of your list of candidate moves.
Position 13 – Black on roll to play 55
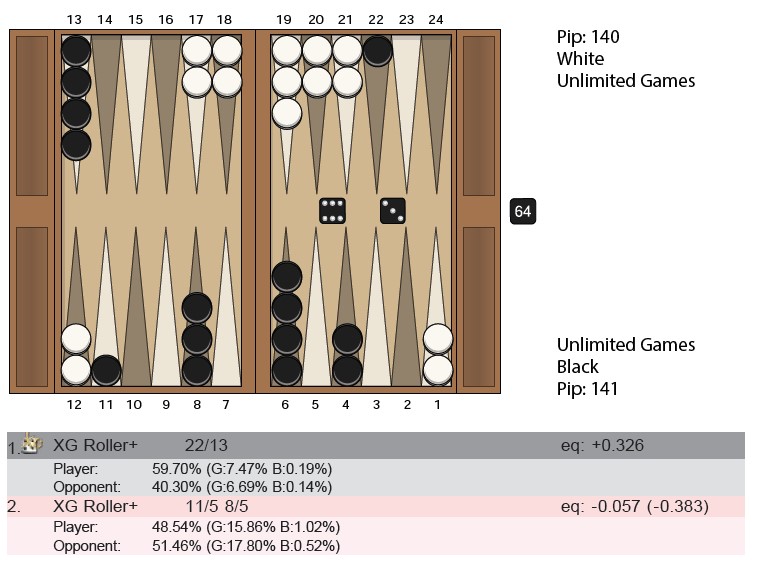
That being said, there are times when it is incorrect to accomplish two tasks when one will do just fine. An example is Position 14 below.
Position 14 – Black on roll to play 53
You can accomplish two tasks by making your ace-point (hitting and making a new point), but it is a little better to simply make your five point.
Why? The reason is that the theory of tasks has to take into account not only the quantity of tasks you can accomplish but their quality as well.
In this example, you are better off making the five-point because it starts a prime. By hitting and making your ace point, you do make a new point and put your opponent on the bar, but you have created a huge gap in your board and will be hard-pressed to contain Your opponent’s checkers.
Preparing for Next Time
This brings us to the last theme of this article. What if you can’t accomplish any of the three basic tasks?
In that case, you must improvise — by which I mean you should prepare to accomplish one of the tasks.
For example: if you can’t make a new point, mobilize builders to try to make a new point on your next roll. Position 15 (below) is an example of this theme.
Position 15 – Black on roll to play 43
Black can’t hit, make a new point, or escape, but they can bring builders down from their midpoint to make a new point on the next roll. There is risk involved (those builders are blots that can be hit), but at least Black is preparing to fulfill one of their key tasks.
In Position 16, Black can’t accomplish any of the three basic tasks, but they can prepare to accomplish one (escaping) by moving their back checker up.
Position 16 – Black on roll to play 21

Summary
To summarize, we have examined a number of examples where you should attempt to accomplish at least one of the three basic tasks of backgammon checker play: 1. To hit, 2. To make a new point, or 3. To escape a back checker.
This doesn’t address the difficult question of which one of these three you should choose if you can do only one. That is beyond the scope of this article.
I hope that this introduction to the basic concepts of checker play will add to your enjoyment of the game and improve your winning chances. Until next time, play well and have fun.